Introduction
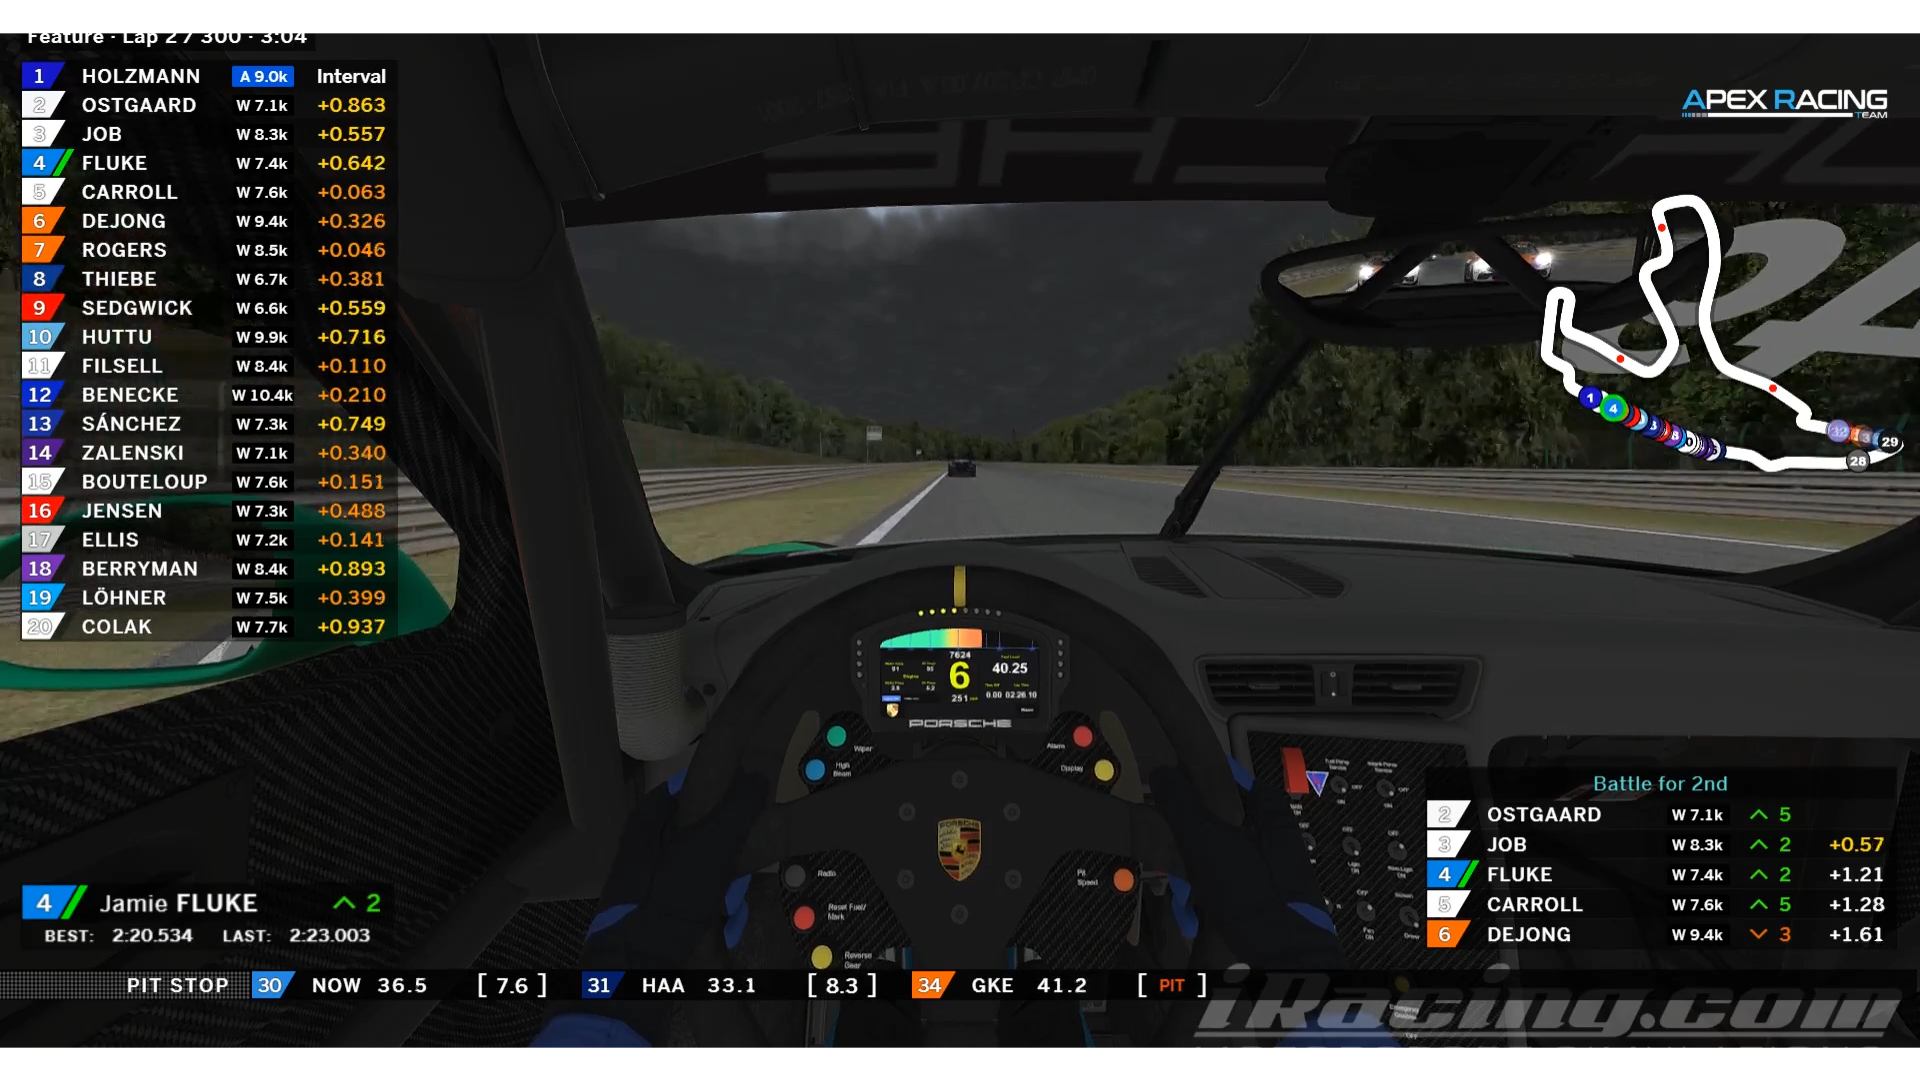
The iRacing Live HUD displays an overlay generated by iRacing Live Timing and displays it with a transparent background on top of your iRacing client. This can be advantageous for:
- Only viewing an overlay whilst driving
- Viewing a separate overlay when driving from what your viewers can see on a stream, check Second Overlay Instance for more information.
- Broadcasters using a capture card
- Streamers wanting to see the overlay as it is broadcast while driving
iRacing Live HUD is only available for Windows 8, 10 and 11 users due to the DirectX Subsystems that are required. iRacing must be running in Windowed or Borderless Windowed mode for Live HUD to display.
Installation
To use iRacing Live HUD we first need to setup the iRacing Live Timing software. Follow the instructions here: iRacing Live Timing User Manual
Ensure you have completed the configuration in iRacing step from the user manual above before progressing.
Next download the iRacing Live HUD installation file either from your “Completed Order” email or from My Account. Windows may give you a warning prompt. The application will be installed and run. A shortcut is also added to your start menu.
Configuration in iRacing Live Timing
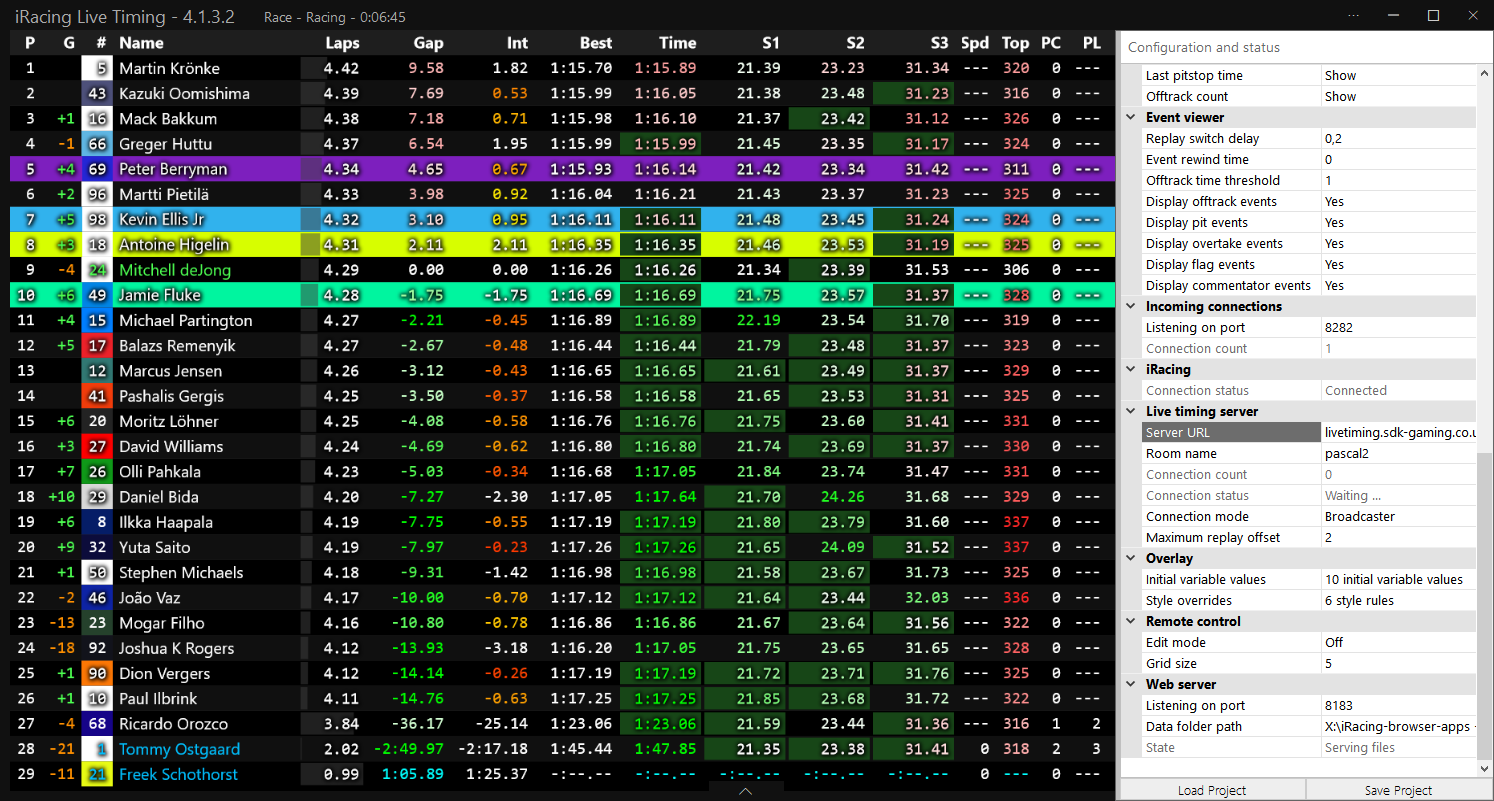
Click the “Hamburger Menu” button in the top right hand corner of iRacing Live Timing or press F3 to open the settings panel. At the bottom of the panel select Load Project and navigate to your extracted iRacingLiveTiming folder (most likely within your main Documents folder) and select the Driver.iRacingLiveTimingProject file.
Just to display your overlay whilst driving, no other configuration in iRacing Live Timing is required and you can skip to the next section.
If however you want to be able to connect to your race session data from a remote device (for one of our web apps for example) then in your F3 Settings panel scroll down to the bottom and set the:
- Room name
This is the room in our central server where live timing data is sent. You can then use the room based link displayed in your Settings / Links to share Live Timing, Live Track map and Live Event links to your viewers/teammates etc.
Be sure to choose a unique room name, not a name that could likely be chosen by another user.
Configuration in iRacing Live HUD
iRacing must be running in Windowed or Borderless Windowed mode.
The user interface of the iRacing Live HUD is accessed from within your system tray (use the up arrow on the right of your Windows taskbar). When right-clicking the application tray icon you can:
- Open the settings dialog box
- Reload the Overlay
- Close the application
By default the Room field is already empty and this is the recommended setting for most users. If you wish to view a remote users overlay then enter the correct iRacing Live Timing room name to view.
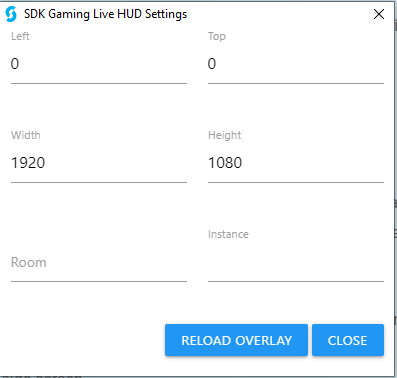
Using the settings dialog box it is easy to resize and/or move the transparent overlay window. The left=0 and top=0 position corresponds to the upper left corner of the main window. Your required settings will depend on your hardware/software configuration:
- In the case of a 3 HD screen display without surround/eyefinity enabled and centre screen being the main screen, left should be set to -1920 to cover the left hand side screen, 0 to cover the centre screen and 1920 to cover the right hand side screen.
- In the case of a 3 HD screen display with surround/eyefinity enabled one large virtual screen surface covers all 3 screens. In this case left should be set to 0 to cover the left hand side screen, 1920 to cover the centre screen and 3840 to cover the right hand side screen.
Width should be set to the resolution width of your monitor(s), height should be set slightly lower than the resolution of the screen to allow proper working of the windows task bar hide/show feature.
Instance is only used if you are trying to display multiple overlays. Find out more information here
Choose What Information is Displayed
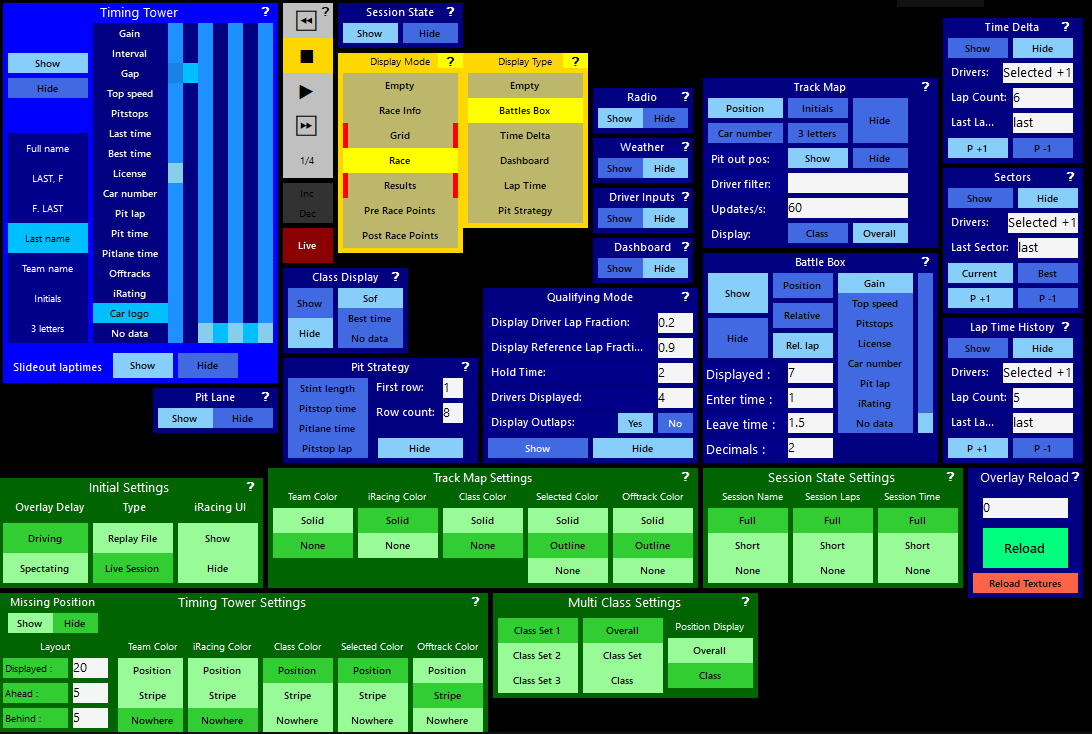
So now that you have a default overlay displaying in Live HUD we can decide what Components of the overlay we choose to Hide or Show. In iRacing Live Timing press F4 or click the up arrow at the bottom of the screen and you will see a layout of buttons appear. We will use the Driver default project file in our example.
By hovering your mouse over a Component or a button within a Component, a tooltip will display with a brief description of what it does. You can also click on the question mark in the corner of each Component to open the website support page for that Component.
Most of the buttons displayed allow for a simple Show or Hide option for a particular component. For example if I select Hide under the label Track Map the Track Map will disappear. Some of the components have buttons for tuning what type of information is displayed. For example the Timing Tower can be set to display a variety of different information, much of it simultaneously if you wish and present it in different ways (for instance during multi class racing).
You now have setup a basic overlay that allows you to Show and Hide different components to display the information you whilst driving!! However iRacing Live Timing allows almost infinite amounts of customisation to your overlay to create a personal and unique overlay with many advanced features! Head over to Overlay Component List, Remote Control Tab and Editing CSS Styles for more information on beginning this customisation and remember to jump in our Discord support server for any other questions!