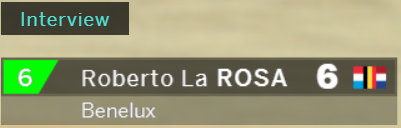
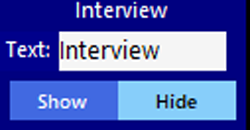
The Interview Component will display a label with editable text, by default it says Interview.
Components are imported directly from within iRacing Live Timing. In iRacing Live Timing press F4 to open the Remote Control Tab and then F2 to enter Edit Mode. Click the Import Library button and select from the list the component you want to import. The component will then be imported to your Remote Control Tab in the first available empty space (often below existing components).
For a full list of all available Overlay Components please check out the Overlay Component List
Display Data
The Interview component was created to add an Interview label on top of the Driver Details Component for use by broadcasters. You can edit this with any other text and use it to serve a different purpose.
- Text – By default the text field states Interview. You can replace this with any text.
- Show/Hide – Display or hide the label.
CSS Style Overrides
To customise your overlay we need to override the default CSS code that dictates how an individual component looks, where it is positioned and how it animates etc. In iRacing Live Timing press F3 to open the Configuration Panel, scroll down to find the Style Overrides field and click the 3 dots to open the screen on the left. Copy and paste the code below into the bottom of the Style Overrides window and adjust the values to get the desired effect. Read more information about using Style Overrides here: https://www.sdk-gaming.co.uk/knowledge-base/editing-css-styles/
.overlay>.interview {
    left: 20px;
    bottom: 130px;
    transform: perspective(1000px) translateZ(0px);
    transform-origin: left bottom;
}