The Driver Details Component will display information about the selected driver.
Components are imported directly from within iRacing Live Timing. In iRacing Live Timing press F4 to open the Remote Control Tab and then F2 to enter Edit Mode. Click the Import Library button and select from the list the component you want to import. The component will then be imported to your Remote Control Tab in the first available empty space (often below existing components).
For a full list of all available Overlay Components please check out the Overlay Component List


Display Mode
- Lap Times – Displays last and best lap times of the selected driver under their name.
- Team – Displays car number and country flag as well as Team Name for the selected driver under their name as set in iRacing or F3 Configuration Panel / Driver Overrides.
- Multicar team – Displays car number and country flag as well as Multicar Team Name for the selected driver under their name as set in F3 Configuration Panel / Teams and Driver Overrides.
- Driver video – Displays video feed as setup in the Video Streams component under driver name.
- Hide – Hides the Driver Details component.
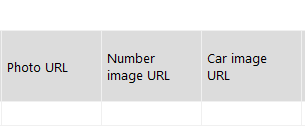
- Photo – Displays the driver image set in either Driver Information App or from Photo URL in Driver Overrides.
- Helmet – Helmet is displayed and driver image is hidden.
- Helmet if no Photo – Driver image is displayed if available, helmet is displayed only if driver image is not available.
- Hide (Photo) – Hides the driver image set in either Driver Information App or from Photo URL in Driver Overrides and the driver helmet.
- Car – Displays the car image set in Car image URL in Driver Overrides.
- iRacing car – Displays the iRacing rendered car image.
- iRacing car if no Car – Car image is displayed if available, iRacing rendered car image is displayed only if Car image is not available.
- Hide (Car) – Hides the Car image or iRacing rendered car image.
Driver Helmets
2 kinds of helmet skins can be displayed:
- Trading paints image skins or helmet_123456.tga image skins found in the iRacing\paint folder. A local proxy or room connection can be used with your iRacing folder path being automatically sent to the overlay. These can be displayed in Live HUD with a room or local connection. In OBS use the below URL with your local or room link entered (both options are automatically generated for you in F3 Settings / Links in iRacing Live Timing:
Local Link:
http://localhost:8008/overlay/f1-overlay.html?server=localhost:8282
Room Link:
https://livetiming.sdk-gaming.co.uk/f1-overlay.html?room=YOUR_ROOM
- Helmet skins based on iRacing class, helmet style and colours set in the iRacing member site or iRacing UI. These skins are dynamically rendered by iRacing and therefore are always available to the overlay, they are displayed only if custom image skins are not available.
Car Images
2 kinds of car images can be displayed:
- The image loaded for the selected driver from the Car image URL field in iRacing Live Timing / F3 Settings / Driver Overrides. Although this is labelled as car, of course it can be any image you want that will display in addition to the driver helmet/driver photo.
- A car image rendered by iRacing using a custom livery if available in the paints folder. A local proxy or room connection can be used with your iRacing folder path being automatically sent to the overlay. These can be displayed in Live HUD with a room or local connection. The URL in OBS would be as shown above in the Driver Helmets section.
- Car number, class color and driver name will be rendered on top of the livery.
- If a custom livery is not available in your paint folder the default livery as set in iRacing will be displayed.
CSS Style Overrides
To customise your overlay we need to override the default CSS code that dictates how an individual component looks, where it is positioned and how it animates etc. In iRacing Live Timing press F3 to open the Configuration Panel, scroll down to find the Style Overrides field and click the 3 dots to open the screen on the left. Copy and paste the code below into the bottom of the Style Overrides window and adjust the values to get the desired effect. Read more information about using Style Overrides here: https://www.sdk-gaming.co.uk/knowledge-base/editing-css-styles/
.overlay>.driver-details {
    left: 20px;
    bottom: 40px;
    transform: perspective(1000px) translateZ(200px);
    transform-origin: left bottom;
}
Opaque Style Rules
A new opaque CSS class has been added to Driver details Component’s driver photos having no transparent pixels to allow specific styling:
- In this example, opaque images are displayed in a circle:
.overlay>.driver-details>.data-wrapper>.photo-wrapper>.photo.opaque {
    border-radius: 50%;
}

- Photo with transparent pixels are not affected with the above code:
- Styles can also be applied to photos with transparent pixels:
.overlay>.driver-details>.data-wrapper>.photo-wrapper>.photo:not(.opaque) {
    border-radius: 10%;
}
Car Image Style Rules
Here are the style rules required to adjust car size and position in the Driver Details Component:
Car image (from Driver Overrides):
.overlay>.driver-details>.data-wrapper>.car-wrapper>.car {
    max-width: 300px;
    max-height: 110px;
    right: -20px;
    bottom: -10px;
}
max-width & max-height – Car images are resized to fit in the rectangle described by these values
right – Decrease value to move car image to the left
bottom – Sets height of the car relative to the driver details
iRacing rendered car image:
.overlay>.driver-details>.data-wrapper>.car-wrapper>.iracing-car {
    max-width: 300px;
    right: -50px;
    bottom: -50px;
}
max-width – Sets image size
right – Decrease value to move car image to the left
bottom – Sets height of the car relative to the driver details